On this day in the Great War (1914-1918)

Ad: This forum contains affiliate links to products on Amazon and eBay. More information in Terms and rules

30 August 1914, Royal Navy warships arrive off the coast of German held Samoa and offload New Zealand troops at Apia, who, without a fight, remove the German administrators and haul down the German Imperial ensign and raise the Union Jack. The Ships were the light cruisers HMS Philomel, Psyche and Pyramus, based in New Zealand at the time and described as 'unspeakably useless' and the New Zealand registered Union Steamship Coy merchant ships Monowai and Moeraki carrying some 1400 troops. There was a fear that the German East Asiatic Squadron under Maximillian Graf von Spee was in the region, as Spee had left the German colony at Tsing Tao on the third and had not been heard of since, but he was not there thankfully - the three cruisers were no match for any of Spee's ships, not least his two armoured cruisers Scharnhorst and Gneisenau.
 
Last edited:
Another important occurence for 16 August; the German battlecruiser Goeben and light cruiser Breslau of the Mittelmeer Division (Mittelmeer - Mediterranean) are officially commissioned into the Ottoman Navy as Yavuz Sultan Selim and Midilli respectively, although still operating their German crews. This was after several days evading a superior British squadron, during which time the two ships docked in Messina for coal and arriving in the Dardanelles on the Tenth.
 
Some more info regarding the first German aeroplane brought down in action during the war in post #20. on 25 August a German two seater (which type?) was brought down by a flight of three B.E.2cs of 2 Sqn RFC, led by Lt H.D. Harvey Kelly. The B.E.2.cs, chased the German until he landed in a field and the two crew ran off. Harvey Kelly landed and gave chase on foot, but the Germans had disappeared into the woods. The German aeroplane was burned.

On 30 August, Paris became the first city to be bombed from the air. Lt Ferdinand von Hiddesen flying a Rumpler Taube dropped three bombs near Gare de l'Est railway station and a message attached to a sand bag reading "The German Army is at the gates of Paris. There is nothing for you to do but surrender."

on 26 August, the German light cruiser Magdeburg ran aground on Odensholm Island during a mine laying sortie in the Baltic and was fired on and destroyed by Russian ships, but not before the Russians recovered the German naval code books, which were forwarded to the British Admiralty.
 
Last edited:
27th August
Battle of Malines ends (see 25th).
British Marines landed at Ostend, accompanied by R.N.A.S. unit.
Lille occupied by German cavalry (see September 5th).
Mezières occupied by German forces (see November 10th, 1918).
M. Millerand appointed French Minister for War (see 26th, and October 29th, 1915).
First attack on Mora (Cameroons) (see September 8th, 1915).
28th August
Battle of the Meuse ends (see 25th).
Austro-Hungarian declaration of war received by Belgian Government (see 22nd).
Naval action off Heligoland (German light cruisers "Köln", "Mainz", and "Ariadne" sunk by British squadron).
29th August
Arras evacuated by the French forces (see September 30th).
First Battle of Guise begins (see 30th).
Sedan taken by German forces (see November 6th, 1918).
Battles of the Western Front: First Encounters and Battles of the Frontiers

German airship "Z.-5" brought down by gunfire at Mlawa (Poland).
August 30th
Laon, La Fère, and Roye occupied by German forces (see March 17th, 1917, and October 13th, 1918).
First Battle of Guise ends (see 29th, and November 4th, 1918).
First German aeroplane raid on Paris (see September 16th, 1918).
First Battle of Lemberg (Galicia) ands (see 26th, and September 3rd).
First attack on Garua (Cameroons) (see April 18th, 1915).
Samoa occupied by New Zealand Expeditionary Force.
31st August
Amiens entered by German forces (see September 13th).
Battle of Tannenberg ends (see 23rd).
Franco- British Agreement defining provisional zones in Togoland concluded (see 26th, and December 27th, 1916).
SEPTEMBER 1914
1st September
Lord Kitchener visits France to confer with the British Commander-in-Chief.
Craonne taken by German forces (see May 4th, 1917).
Soissons taken by German forces (see 13th).
First unit of Indian Expeditionary Force "C" arrives at Mombasa (see August 19th and December 31st).
General J. Stewart takes over command of British forces in East Africa (see October 31st).
 
The RAN at war
source

On This Day ? 1914-1918 » Naval Historical Society


catch up timeline

28 Feb 1914
The E class submarines HMA Ships AE1, (LCDR T. F. Besant, RN), and AE2, (LCDR H. H. G. D. Stoker, RN), were commissioned in Portsmouth, England. AE1 and AE2 were laid down in Vickers Yard, Barrow-in-Furness, England. AE1 was launched on 22 May 1913, and AE2 on 18 June 1913. AE1 and AE2 departed Portsmouth on 2 March 1914, for Australia.

--------------------------------------------------------------------------------
02 Mar 1914
HMA Submarines AE1 and AE2 sailed from Portsmouth on their maiden voyage to Australia. The passage took 83 days and was at the time the longest journey ever under taken by a submarine.

--------------------------------------------------------------------------------
01 Apr 1914
LEUT A. M. Longmore, an Australian serving with the Naval Wing of the Royal Flying Corps, flew the First Sea Lord, Winston Churchill, on his first flight in a Maurice Farman seaplane.

--------------------------------------------------------------------------------
24 May 1914
The RAN's first two submarines, AE1 and AE2, arrived in Sydney after a record voyage from England.

Within a year both submarines had been lost on active service, with AE1 lost during the campaign in German New Guinea, and AE2 lost in the Sea of Marmora during the Gallipoli Campaign.

--------------------------------------------------------------------------------
28 Jul 1914
LEUT A. M. Longmore, an Australian serving with the RNAS, made the first successful aerial torpedo drop by a naval pilot from a Short Folder seaplane.

--------------------------------------------------------------------------------
30 Jul 1914
Garden Island Wireless Station intercepted the Admiralty warning to HM Ships that war with Germany was imminent.

--------------------------------------------------------------------------------
03 Aug 1914
Even before the declaration of war between Britain and Germany, the Australian Cabinet met in Melbourne and promptly offered the Australian fleet to Britain.

Port war lookout and examination stations were manned by the Royal Australian Naval Brigade. Stations were established at all major ports.

All wireless stations in Australia were placed under the control of the Naval Board. Censorship of all cable and wireless traffic was enforced.

--------------------------------------------------------------------------------
04 Aug 1914
Great Britain declared war on Germany. The telegram informing Australia of a state of hostilities was not received in Melbourne until 5 August. At the outbreak of war the strength of the RAN was 3800 of all ranks.

A warning shot was fired across the bows of the German merchant ship PFALZ by the Nepean Battery on Port Phillip Bay, VIC, when the vessel attempted to escape to sea. PFALZ turned back and was seized. Records suggest this was the first shot fired by British forces against the Germans in the First World War.

The Sydney pilot steamer CAPTAIN COOK, was commissioned as an examination vessel.

--------------------------------------------------------------------------------
05 Aug 1914
The message conveying the news of the outbreak of war with Germany was received in Australia at 12.30pm.

The disposition of ships of the RAN, at the declaration of WWI, was: HMAS AUSTRALIA, (battle-cruiser), steaming north from Sydney; HMAS MELBOURNE, (cruiser), steaming south from Sydney; HMA Ships SYDNEY, (cruiser), WARREGO and YARRA near Thursday Island; HMAS PARRAMATTA, (destroyer), nearing Townsville; HMAS PROTECTOR, on passage from Melbourne to Sydney; HMAS ENCOUNTER, and submarines AEI and AE2, at Sydney; HMAS PIONEER, at Port Phillip, VIC; HMAS GAYUNDAH on passage from Sydney to Brisbane.

--------------------------------------------------------------------------------
07 Aug 1914
VADM Sir George Patey, RN, wrote the first wartime order for the RAN, and for that matter the Commonwealth of Australia, whilst onboard his flagship, HMAS AUSTRALIA, (battle-cruiser). It was Operational Order No. 1, headed 'Intention'.

--------------------------------------------------------------------------------
10 Aug 1914
An Australian Government Order-in-Council was gazetted placing all Commonwealth Naval Forces, including the Naval Board, under British Admiralty control, for the duration of WWI, (and was later repeated for WWII).

--------------------------------------------------------------------------------
11 Aug 1914
HMAS AUSTRALIA, (battle-cruiser), and the Australia Squadron, under VADM Sir George Patey, RN, arrived in St Georges Channel, near Rabaul, on a search for ADML von Spee's forces.

The German naval and merchant services code was captured from the German vessel HOBART, (merchant ship), at Port Phillip, VIC. The boarding officer, CAPT J. T. Richardson, RN, used a subterfuge to allow the German Captain to retrieve the codes from their hiding place. Richardson seized the books at gunpoint as they were about to be thrown overboard.

HMA Ships PARRAMATTA, YARRA, and WARREGO, (torpedo boat destroyers), launched a night torpedo attack on the German anchorage in Simpsonhaven, New Britain only to find the port was empty. During the day HMAS AUSTRALIA, (battle- cruiser), captured the enemy ship SUMATRA whilst patrolling St Georges Channel.

--------------------------------------------------------------------------------
12 Aug 1914
HMA Ships PARRAMATTA, YARRA, and WARREGO, (torpedo boat destroyers), landed parties at Rabaul.

HMAS ENCOUNTER, (cruiser), captured the German steamer ZAMBESI in St George's Channel, New Britain.

--------------------------------------------------------------------------------
13 Aug 1914
HMAS MELBOURNE, (cruiser), intercepted the collier ALCONDA off Rossel Island, and requisitioned her cargo of coal.

--------------------------------------------------------------------------------
16 Aug 1914
HMAS PIONEER, (light cruiser), captured the German merchant ship NEUMUNSTER, off Rottnest Island, WA.

--------------------------------------------------------------------------------
18 Aug 1914
The auxiliary cruiser HMAS BERRIMA, (CMDR J. B. Stevenson, RN), was commissioned. BERRIMA was requisitioned for the RAN, from her owners, the P&O Steam Navigation Co Ltd, in August 1914.

ADML von Spee, C-in-C, German Pacific Fleet, recorded in his journal: 'The AUSTRALIA is my special apprehension-she alone is superior to my whole squadron'.

--------------------------------------------------------------------------------
20 Aug 1914
The German cruiser MAGDEBURG was captured by the Russian Navy, after running aground in a fog in the Gulf of Finland. Code books recovered from the cruiser were rushed to London, where intelligence experts matched them with merchant service code books seized by the RAN on 11 August, from the German ship HOBART, in Port Phillip, VIC. By November 1914 all German naval wireless traffic was being intercepted and decoded orders passed to the British Fleet.

--------------------------------------------------------------------------------
26 Aug 1914
HMAS PIONEER, (3rd class cruiser), captured the German merchant vessel THURINGEN, off Fremantle, WA.

--------------------------------------------------------------------------------
30 Aug 1914
VADM Sir George Patey, RN, in HMAS AUSTRALIA, arrived of Samoa, and the official surrender of German Samoa took place. The squadron comprised AUSTRALIA, HMA Ships MELBOURNE, and PSYCHE , and HM Ships PYRAMUS and PHILOMEL.

--------------------------------------------------------------------------------
04 Sep 1914
The cruiser HMS PSYCHE, (later HMAS PSYCHE), and survey ship HMS FANTOME, (later HMAS FANTOME), joined the contraband patrol in the Bay of Bengal.

Battle of Heligoland Bight 28 August 1914

Commander Tyrwhitt (RN) was charged with leading the Harwich Force of two light cruisers, Fearless and Arethusa, accompanied by two flotillas of 31 destroyers, 1st and 3rd Flotillas, in a raid upon German shipping located close to the German naval base at Heligoland.

Acting as cover for Tyrwhitt's force was the First Battle Cruiser Squadron, recently arrived from Scapa Flow and under the command of Vice Admiral Beatty. His squadron consisted of the battlecruisers New Zealand and Invincible, plus three other battlecruisers.

Tyrwhitt began the action by sinking two German torpedo boats at around 7am on 28 August. Not entirely surprised by the British attack, the Germans hastily deployed the Frauenlob and the Stettin, joined shortly afterwards by four other light cruisers, including Rear Admiral Mass's flagship, Koln.

Finding himself outgunned by the German defence and under increasing fire, with the Arethusa heavily damaged, Tyrwhitt called Beatty for urgent assistance at 11.25am. Beatty, some 40km to the north, hurried to Tyrwhitt's assistance, arriving at 12.40pm. In time to save Tyrwhitt, Beatty's squadron sunk Mainz, Koln, and Ariadne and damaged a further three other cruisers.

Retreating hurriedly under the cover of mist, the Germans had lost 1,200 men, as opposed to just 35 British fatalities.

As a consequence of the action, Beatty enhanced his reputation as a fighting seaman; it also influenced the Admiralty's decision to appoint Beatty as Commander of the Grand Fleet, replacing Sir John Jellicoe, who was summarily dismissed by Lloyd George on Christmas Eve, 1917, in a dispute over the use of convoy shipping.

Beatty's success however overshadowed deficiencies in the British handling of the encounter, in areas as diverse as planning and communication.
 
Last edited:
Great info Parsifal, but...

20 Aug 1914: The German cruiser MAGDEBURG was captured by the Russian Navy, after running aground in a fog in the Gulf of Finland. Code books recovered from the cruiser were rushed to London, where intelligence experts matched them with merchant service code books seized by the RAN on 11 August, from the German ship HOBART, in Port Phillip, VIC. By November 1914 all German naval wireless traffic was being intercepted and decoded orders passed to the British Fleet.

According to my sources (Conway's All the world's fighting ships 1906-1921) it was 26 August.

"Prince Heinrich, the overall commander of the Baltic naval forces, replaced Mischke with Rear Admiral Behring. Behring ordered another operation for 26 August to sweep for Russian reconnaissance forces in the entrance to the Gulf of Finland. Early that morning, Magdeburg ran aground off the lighthouse at Odensholm on the Estonian coast. Her escorting destroyer, V.26, attempted to pull her free but was unable to do so and began taking off part of Magdeburg's crew. While the evacuation was going on, the Russian cruisers Bogatyr and Pallada appeared and shelled the stranded cruiser. The Germans destroyed the forward section of the ship, but could not complete her destruction before the Russians reached the ship. Fifteen crew members from Magdeburg were killed in the attack. The German code books were also not destroyed; the Russians were able to recover three of the books along with the current encryption key. They passed one copy to the British Royal Navy via a pair of Russian couriers on 13 October. The Russian Navy partially scrapped the ship in situ and eventually destroyed the wreck."

From here: https://en.wikipedia.org/wiki/SMS_Magdeburg
 
Yes, I think your version is correct. there appears another error in the Hysterical societies notes. They are claiming HM Australia took the surrender of Samoa before the assault on Rabaul. I think it was the other way around, and the assault into New Guinea did not take place until September
 
Australia's first amphibious campaign and the largest territorial gains of the war....
Wartime Issue 20 | Australian War Memorial

"Australia did not enter the First World War with the landing on Gallipoli on 25 April 1915. When war broke out in August 1914, Australians faced an immediate military threat in their region – a situation they had long feared. German possessions and warships in the Pacific posed a threat to Australian shipping and ports. With a shared-land border between British Papua and German New Guinea, an enemy was suddenly at Australia's northern frontier.

On 6 August, Australia agreed to undertake a "great and urgent imperial service": to seize German wireless stations in the south-west Pacific, specifically German New Guinea. Australia was also required to occupy the territory under the British flag and establish a military administration. For the first time, Britain called on Australia to train, supply and command her own forces in defence of the empire.

The man selected to raise what would become known as the Australian Naval and Military Expeditionary Force (AN&MEF) was Boer War veteran Colonel William Holmes, who came to the position with a reputation for "personal bravery, ability and capacity for command". He did not disappoint his superiors. In less than 10 days, Holmes recruited, equipped and embarked a 1,000-strong infantry battalion, 500 naval reservists and ex-seamen, and a 500-strong citizen-battalion from north Queensland. The majority of the force were untrained men who had rushed to enlist at the outbreak of war. Holmes noted the abundant enthusiasm of his men, but also their inexperience, with many having "never been put to sea".

The expedition was delayed when the commander-in-chief of the Australian fleet, Rear Admiral Sir George Patey RN, was unexpectedly called away on escort duties in Samoa. Most of the AN&MEF, now aboard HMAT Berrima, had to wait at Palm Island, off Townsville in Queensland. Here they went ashore each day for jungle training and drill. After two long weeks, Berrima sailed for Port Moresby to meet the Queensland battalion waiting on board the hospital ship HMAT Kanowna. Upon inspection, Holmes decided regretfully that the youthful and unseasoned troops were "unfit for active service". Nevertheless, Patey decided that they should accompany the expeditionary force and perform garrison duties.

The naval force, comprising Sydney, Encounter, Yarra, Warrego, Berrima and the supply ship Aorangi, and the submarines AE1 and AE2, gathered at Port Moresby before rendezvousing with HMAS Australia on 9 September en route to Rabaul. Only then did Patey reveal the precise destination of the convoy. The Kanowna's stokers, who had not volunteered for overseas service, called a snap strike as soon as they discovered they were heading into a war zone. Eager not to miss out, the soldiers offered to stoke the ship the rest of the way. For the battalion aboard Kanowna, that was the end of their adventure. Unimpressed by the stokers and the low military standard of the men, Holmes ordered the ship back to Australia.

The slightly depleted AN&MEF approached Blanche Bay, just south of Rabaul, at dawn on 11 September 1914. The military leaders had expected the occupation to be a simple exercise; nevertheless they had sent 1,500 men and almost the entire Australian fleet. Then, not having encountered any naval formations or coastal defence, the AN&MEF became complacent. Holmes, in particular, convinced himself that he could acquire new territory for the British empire "without a shot being fired".

Two parties of 25 naval reservists went ashore at the settlements of Herbertshöhe and Kabakaul, on the south-eastern shore of the bay. Their orders were to capture the radio station at Bitapaka, about seven kilometres inland. Lieutenant R.G. Bowen, RAN, led his men from Kabakaul and headed inland along a narrow road. They had travelled less than two kilometres when they encountered three Germans and about 20 New Guineans fighting for the Germans. "This is where the fighting began, shots being exchanged as fast as we could put them in our barrels," recalled Able Seaman Sidney Staines, a member of the lead party. "Bullets were buzzing all around us … I was expecting to drop anytime at this stage, so we got together and started firing volleys."

The Australians soon captured the group after wounding one of the Germans. A map found on one of the prisoners revealed German plans to resist the Australian troops by means of a system of trenches, rifle pits and mines. Bowen sent for reinforcements and pushed on. Some New Guineans had climbed the tall trees and were firing from elevated positions. The Australians made slow progress and "were constantly subjected to rifle fire by an unseen enemy", which forced them from the narrow road into dense jungle.

As they approached the first trench, Able Seaman W.G.V. Williams was shot through the stomach. Captain Brian Pockley, the medical officer, immediately set out to find him. Under fire, Pockley removed his red-crossed brassard and tied it around Leading Stoker Kember's hat, in the hope that the enemy would respect the symbol. Soon after, Pockley himself was wounded. Both men were taken aboard Berrima, where they died later that afternoon. Williams became the first Australian to die in action in the Great War.

For the young men in the AN&MEF, the excitement of joining Australia's first action of the war gave way to the realities of combat. Able Seaman "Gus" Shea was in the thick of the attack and helped carry the dead and wounded to the beach: "It is terrible to hear the wounded scream," he wrote in a letter home. "I don't want to hear anymore."

Back on the Bitapaka Road, Bowen's men encountered a well-defended trench dug across the road. As reinforcements arrived, a sniper's bullet pierced Bowen's helmet, leaving a deep furrow along the side of his head. Lieutenant G.A. Hill, RNR, assumed command and sent a runner to Berrima calling for more support. A few hours later, Lieutenant Commander Charles Elwell, RN, arrived with 50 men. He launched a flanking attack and charged the enemy. Sword in hand, Elwell was shot through the heart. Outflanked on both sides, the Germans surrendered.

Tensions remained high. Shots rang out, possibly from snipers, when the forward party captured the second trench held by three Germans and 20 New Guineans. As Lieutenant W.D. Hunter wrote to his girlfriend, they "made a break … and the officer and ten niggers were shot while escaping". Able Seaman Henry Street was mortally wounded in the exchange.

Three Germans and about 30 New Guineans were killed in the fight for the Bitapaka wireless station. The claim that Australians bayoneted some of the New Guineans who fell into their hands during the fighting is probably true. Numerous personal letters and diaries reflect the mixture of racism, inexperience and anger at having lost men to the New Guinean fighters, and this would have contributed to the brutal treatment of the Indigenous population.

At 7.00 pm the wireless station was captured and Admiral Patey demanded the German acting governor, Dr Edward Haber, surrender the entire colony. Although Haber did not officially surrender, he told Patey that Rabaul and Herbertshöhe were "unfortified" and "no opposition [would] be offered to the military occupation". The next day the naval reservists marched from Kabakaul to Herbertshöhe, and Berrima landed a garrison at Rabaul.

On Sunday 13 September, AN&MEF forces raised the Union Jack in Rabaul. A translator told the New Guineans who looked on: "All boys belongina one place, you savvy big master … No more 'Um Kaiser, God Save 'Um King." With this sentence, the Australians asserted the authority of their military administration and custody of the Indigenous population was transferred from one imperial power to another.

By October, departments of Treasury, Works, Law and Lands and Surveys were in operation. But it was as administrators of the colony that the AN&MEF began to fall apart. Corruption and undisciplined behaviour marred the occupation. Most of the troops saw no action, and the boredom fuelled unruly and rampageous behaviour. Harsh discipline – 137 Australians were court-martialled in the four months to December 1914 – seemed no deterrent. Most were eager to join the war in Europe, and on their return to Australia in early 1915 many re-enlisted for service in the AIF.

Australia's first action in the war certainly made headlines at the time. Naturally, the magnitude of Australian losses in Gallipoli and the Western Front quickly pushed these stories to the fringes of popular memory. But Australians in 1914 knew that the war had come to their part of the world".
 
Formation of the 7th Australian Light horse Regiment

When the First World War began August 1914, Australia offered Great Britain 20,000 troops. Militia units could not be sent overseas, and a new force, the Australian Imperial Force, was raised. New Light Horse Regiments were raised from volunteers - the AIF remained a volunteer force throughout the war. The Light Horse regarded as mounted infantry, and were trained with the infantry weapons of Lee Enfield rifle (S.M.L.E., .303 inch) and bayonet.

The 7th Light Horse Regiment was formed at Liverpool and Holsworthy, near Sydney, New South Wales in October/ November 1914. The Regiment belonged to the 2nd Australian Light Horse Brigade. . Lt Col J. M. Arnott of 11th Light Horse became the Regiment's first commanding officer with Major G. M. Macarthur-Onslow of 9th Light Horse as 2nd-in-command.

Enlisting on the 14 October 1914 was private AW Glenn, my grandfather. The ALH records record him as being assigned to "A" squadron of the regiment, and departing for Egypt aboard the steamer Ayrshire 9that explains why out family property was called "Ayshire"...I thought it was named after Ayshire downs, but could never work out why "downs' was dropped from the name). His service record simply states

158 Private Albert William GLENN, a 22 year old Stockman from Redfern, New South Wales. He enlisted on 10 October 1914; and subsequently Returned to Australia, 15 November 1918.

Going through the personel lists for A squadron, they were to suffer more than 60% casualty rates in the four years of war. Most returned dead, or wounded. my grandfather was one of the so called lucky one. though he never recovered from his experiences mentally.

The Regiment sailed for overseas and arrived in Egypt on 1st February, 1915. Later, colour patches were issued to AIF units and worn on tunic sleeves; the colour patch of 7th Light Horse Regiment, was a rectangle, divided diagonally, the upper portion being black and the lower red, worn with the broad of the red to the front. In May, the 2nd Brigade was ordered to Gallipoli, the 7th disembarking there on May 19th. The Light Horse units left their horses in Egypt and served at Gallipoli as dismounted troops to reinforce those fighting on the Peninsula and to make up for some of the unexpectedly high casualties suffered by the infantry since 25th April. The squadrons of the 7th were initially distributed among the battalions of the 3rd Infantry Brigade, but later the Regiment operated as a complete unit. It served at Bolton's Ridge, Tasmania Post, Chatham's Post, the Balkan Pits (??) and Lone Pine. my grandfather fought at lone pine, reluctantly recounting stories of the vicious fighting that occurred in that earthly version of hell. During August, as with many hundreds of others, Lt Col Arnott was evacuated sick and Major (later Lt Col) Macarthur-Onslow took command of the regiment. My grandfathers service records also show that he was wounded by a grenade at that time and was sent to England to recover. He married my grandmother whilst recovering in 1915, returning to Egypt in 1916.

The 7th Regiment fought on the Peninsula until the campaign was abandoned and the troops evacuated in mid-December.

The weakened and weary troops returned to Egypt, where the mounted units were remounted. The 2nd Light Horse Brigade was allotted to Anzac Mounted Division.

The 7th Light Horse served in Egypt, Sinai and Palestine with the Anzac Mounted Division. Lt Gen Sir Harry Chauvel, who commanded the Desert Mounted Corps, wrote of the 7th:

"At the Battle of Romani it was largely due to its stubborn defence and spirited counter-attack, under the leadership of Lt Col G. Macarthur-Onslow that the victory was so complete.

At the first Battle of Gaza, it was this Regiment that led the Anzac Mounted Division through the night to its position in rear of the city and which captured the new Commander of the Gaza Defence, who was on his way up to take his command. During the Attack on Beersheba and the pursuit which followed, the Regiment sustained the fine traditions it had already established for dash and gallantry. In the raids across Jordan and throughout the long summer of 1918 in the Jordan Valley, it bore its share of the fighting and the hardships, from the bitter cold of Gilead in mid-winter to the scorching heat of Jericho in July.

Under Lt Col J. D. Richardson, it played a brilliant part in the final victory which destroyed three Turkish Armies and brought Germany's Ally out of the War."

Decorations and awards gained by the Regiment were as follows: CMG - 2; DSO - 5; MC - 8; Order of the Nile - 4; DCM - 8; MM - 20; Serbian Medal - 5; Mentioned in Despatches - 41; Complimentary Mention (Anzac) - 1; Mentioned in Divisional Orders (Anzac) - 1.

A full narrative has been given in the book "The 7th Light Horse Regiment, A.I.F., 1914-1919" by Lt Col J. D. Richardson, DSO; Publishers E. N. Birks, Radcliffe Press, Sydney.

The following Battle Honours were awarded to the Regiment (those in block letters were borne on the Guidon which was received in 1928: Anzac, DEFENCE OF ANZAC, Sulva, SARI BAIR, Gallipoli, 1915, ROMANI, EGYPT, 1915-17, GAZA-BEERSHEBA, El Mughar, Nebi Samwil, JERUSALEM, JORDAN (ES SALT), JORDAN (AMMAN), MEGIDDO, Nablus, PALESTINE, 1917-18.
 
3 September 1914: The Royal Naval Air Service is made responsible for air defence of the United Kingdom. At this time, the sole air defence of the London area was a single Caudron G.III and its pilot Lt Eric Bentley Beauman, along with a searchlight based at the London Aerodrome at hendon. beauman would later go on to command the aviation aspects of the seaplane tender HMS Manxman and also command an air defence station in Scotland. On 1 September No.3 Sqn RNAS is formed with Sqn Cdr Charles Rumney Samson as commanding officer.
 
Miracle On the Marne. First German Setbacks 5-11 September

Thirty miles northeast of Paris, the French 6th Army under General Michel-Joseph Maunoury begins attacking the right flank of German forces advancing on the French capital. By the next day, the counterattack was total. More than two million soldiers fought in the Battle of the Marne, and 100,000 of them were killed or wounded. On September 9, the exhausted Germans began a fighting retreat to the Aisne River. The Battle of the Marne was the first significant Allied victory of World War I, saving Paris and thwarting Germany's plan for a quick victory over France.

After the outbreak of hostilities in Europe in August 1914, Germany took the offensive in the West, hoping to defeat France before the Russians were able to fully mobilize in the East. The Germans rushed across Belgium, routing the Allies, and by September the "Schlieffen Plan"--the planned outflanking of the French forces--seemed headed to a triumphant conclusion. In early September, German forces crossed the Marne River to the northeast of Paris, and the French government was evacuated to Bordeaux.

As retreating French forces and the British Expeditionary Force scrambled to prepare a counterattack, they were dealt a lucky hand when precise information about the German plan of attack was found in a knapsack retrieved from a slain German officer. The French had thought that German General Alexander von Kluck's 1st Army would march into the Oise Valley, but the plan told of a direct march on Paris. The French commander in chief, General Joseph Joffre, coordinated the information into his battle plans, and on the afternoon of September 5 the French 6th Army under General Michel-Joseph Maunoury surprised the right flank of Kluck's 1st Army near the Marne River.

Kluck turned his army to meet the French 6th Army, creating a gap between his 1st Army and German General Karl von Bulow's 2nd Army, 30 miles to the southeast. The French 5th Army then turned and rushed into the gap to attack BÝlow, and the British Expeditionary Force halted its retreat and turned to likewise advance into the gap. Meanwhile, to the west of the German 2nd Army, the newly created French 9th Army attacked the German 3rd Army.

For three bloody days, the battle shifted back and forth along a 100-mile front. The French 6th Army stubbornly held its ground under heavy counterattacks by Kluck's 1st Army, and at one point 600 Paris taxicabs were enlisted to drive 6,000 French troops from the capital to the battle front. The fighting was so near the city that the automobiles could make the trip there and back on a single tank of gas.

On September 9, General Bulow learned of the approach of the British Expeditionary Force and ordered his 2nd Army to retreat. General Kluck and the German 1st Army had no choice but to follow, and by September 11 the retreat extended to all the German armies. The Germans retreated 40 miles north to the Lower Aisne River, where they dug trenches and succeeded in repelling successive attacks by the pursuing Allied forces. Both sides then tried and failed to outflank each other in the "Race to the Sea," in which trench networks were extended northwestward by both sides until they reached the Atlantic at a point inside Belgium.

Because it defeated Germany's Schlieffen Plan and also ended Allied hopes for a quick end to the war, the First Battle of the Marne ranks as one of the most decisive battles in history. Around 100,000 soldiers were killed or wounded in its six days of heavy fighting, roughly an equal number on each side. By the end of 1914, well over a million soldiers of various nationalities had been killed on the battlefields of Europe, and neither for the Allies nor the Central Powers was victory in sight. On the western front--the battle line that stretched across northern France and Belgium--the combatants settled down in the trenches for a terrible four-year war of attrition.
 
Last edited:
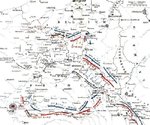
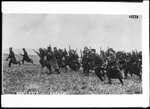
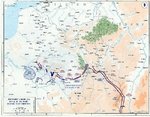
The Battle in Maps and Pictures
 

Attachments

  • German_and_Allied_positions,_23_August_-_5_September_1914.jpg
    German_and_Allied_positions,_23_August_-_5_September_1914.jpg
    107.4 KB · Views: 94
  • 1280px-Infanterie-française-rol.jpg
    1280px-Infanterie-française-rol.jpg
    54.2 KB · Views: 74
  • Battle_of_the_Marne_-_Map.jpg
    Battle_of_the_Marne_-_Map.jpg
    101.1 KB · Views: 104
  • Opposing_positions_5_September_(dashed_line)_13_September_(black_line).jpg
    Opposing_positions_5_September_(dashed_line)_13_September_(black_line).jpg
    35.3 KB · Views: 76
Last edited:
East Front Summary 1914

The Austro-Hungarian Army of 1914 had been starved of proper equipment and resources throughout the pre-war period. It was also composed of an increasingly nationalistic soldiery, three-quarters of whom were from Slavic recruiting districts. The reluctance of these troops to follow Austrian officers into combat against their Russian brethren became a major liability, especially after the enormous losses suffered during the first year of war. The main German armies in the East operated with characteristic Teutonic efficiency. Indeed it was here that their troops enjoyed the luxury of fighting the battles of maneuver for which they had been trained. The Russian front also saw the rise of the great German "artillery virtuosos" of the war, men such as Lieutenant Colonel Georg Bruchmüller. Lieutenant Colonel Bruchmüller was capable of orchestrating artillery firepower with ferocious efficiency, but more importantly he undertook aggressive training measures to assure near perfect coordination between the artillery and infantry branches of the army.

The Eastern half of the Great War began on August 17, 1914, when Russian General Pavel Rennenkampf's First Army invaded Eastern Prussia in a full scale offensive . Two days later, General Alexander Samsonov's Second Army attacked around the right flank of the German Eighth Army commanded by General Friedrich von Prittwitz . This was achieved despite the fact that Second Army was fighting at two-thirds strength due to the slow Russian mobilization. Prittwitz, who was certain that he could not hold against the two armies facing him, informed high command that he intended to withdraw to the Vistula River, abandoning most of East Prussia including Königsberg. He was immediately relieved of duty and replaced by Field Marshal Paul von Hindenburg and his new Chief-of-Staff, Erich Ludendorf. Along with the staff at East Prussian Army Headquarters, they planned a counteroffensive against the Russians. By August 27 they had already laid the plans and fallen on Samsonov's weak Army, taking it in both flanks in a near perfect double envelopment. The Battle of Tannenberg ended by August 30 when Samsonov's entire command disintegrated at a cost of 92,000 captured and tens of thousands of other casualties. Within a week, German forces under General August Mackensen defeated Rennenkampf at the Battle of Masurian Lakes, where the Russians lost another 100,000 casualties. Inadequate logistic support hampered Russian movement and supply. Now, against an industrialized opponent, these shortcomings quickly assumed catastrophic proportions.

In the south of Poland, Austrian Chief-of-Staff Conrad von Hoetzendorf launched his own attack northward toward Warsaw. The Russians however, had concentrated four fully supplied armies opposite the 39 Divisions of Austrian troops, and on August 30 they opened their offensive By the third week in September, Hoetzendorf ordered a general retreat. and the province of Galicia was abandoned by the Austrians at a cost of over 130,000 casualties. Contrary to our popular concepts of the nature of the WWI eastern front, the russians were not uniformly defeated alo9ng the entire front.... The year ended with limited attacks toward Warsaw by Mackensen and Russian probing assaults into the Carpathian passes.

Already, disaffection between the two major central powers was occurring. The increasing alienation between the Austrian and German high commands caused some German officers to cynically state "we are shackled to a corpse."
 
Last edited:
Operations Of the East Asian Naval Squadron August-September 1914

In the start of August 1914 Germany had only one squadron overseas, the East Asia Squadron based at Tsingtao under the command of Vice-Admiral Graf Maximilian von Spee. The squadron consisted of the armoured cruisers SMS Scharnhorst (flag) and Gneisenau and the light cruisers Emden, Leipzig and Nürnberg. The only other German cruisers outside Europe at that time were the Königsberg in East Africa and the Dresden and Karlsruhe in the Caribbean. All these ships were modern with officers hand picked by Tirpitz himself and hand picked crews, it was the best cruiser squadron in the German navy and possibly the world.

Scharnhorst, Gneisenau and Nürnberg sailed for the German base at Pagan, arriving on August 11 to find several German merchant ships there. Emden arrived a day later. The German captains held a conference to decide tactics. Karl von Muller of the Emden asked that his ship be sent to the Indian Ocean as a lone raider, the other cruisers remaining together.

On August 13 they left Pagan and the following morning Emden and her collier Markomannia left for the Indian Ocean.
August 19 they coaled at Eniwetok, several of the supply ships being detached to buy more supplies. Nürnberg was sent to Hawaii to send messages and arrange supplies.

On September 6 the squadron arrived at Christmas Island to find that Nürnberg had already arrived. The following day Nürnberg destroyed the wireless station at Fanning Island.

Scharnhorst and Gneisenau raided the harbour at Western Samoa a week later but found no targets. They then raided Papeete on Tahiti, the French Fort there opened fire but was quickly silenced as well as sinking the gunboat Zelee and the merchant ship Walkure. The French set fire to the islands coal supplies to prevent their capture.
 

Attachments

  • scharnhorstdm[1].jpg
    scharnhorstdm[1].jpg
    35.1 KB · Views: 122
Last edited:
Emden meanwhile was detached for operations in the Indian Ocean. She quickly made her presence felt. Emden was a cruiser that, at the start of the First World War, formed part of the German East Asiatic Squadron. She was detached to stalk the shipping routes across the Indian Ocean and quickly became the scourge of the Allied navies. Between August and October 1914, Emden captured or sank 21 vessels.
Specifications:


Class: Dresden Class light cruiser
Launched: 26 May 1908
Commissioned: 10 July 1909
Complement: 361
Length: 388 feet [118.3m]
Beam: 43.33 feet [13.5m]
Draught: 17.75 feet [5.54m]
Displacement: 3664 tons
Speed: 24 knots
Armament: 10 x 10.5 cm guns
8 x 5.2 cm guns
2 x 45 cm torpedo tubes

Armour: 2 inch [5 cm] deck


On 14 August, Emden and Markomannia left the company of the East Asia Squadron, bound for the Indian Ocean. Since the cruiser Königsberg was already operating in the western Indian Ocean around the Gulf of Aden, Müller decided he should cruise in the shipping lanes between Singapore, Colombo, and Aden. Emden steamed toward the Indian Ocean by way of the Molucca and Banda Seas. While seeking to coal off Jampea Island, the Dutch coastal defense ship Tromp stopped Emden and made clear that she would enforce Dutch neutrality. Müller therefore decided to steam into the Lombok Strait. There, Emden's radio-intercept officers picked up messages from the British armored cruiser HMS Hampshire. To maintain secrecy, Emden's crew rigged up a dummy funnel to give her the appearance of a British light cruiser. She then steamed up the coast of Sumatra toward the Indian Ocean.

On 5 September, Emden entered the Bay of Bengal, achieving complete surprise, since the British assumed she was still with Spee's squadron. She operated on shipping routes there without success, until 10 September, when she moved to the Colombo–Calcutta route. There, she captured the Greek collier Pontoporros, which was carrying equipment for the British. Müller took the ship into his service and agreed to pay the crew. Emden captured five more ships; four were sunk, and the fifth, a steamer named Kabinga, was used to carry the crews from the other vessels. On 13 September, Müller released Kabinga and sank two more British prizes. Off the Ganges estuary, Emden caught a Norwegian merchantman; upon searching her, the Germans determined she was not carrying contraband and therefore released her. The Norwegians informed Müller that Entente warships were operating in the area, and so he decided to return to the eastern coast of India.

Emden thereafter stopped and released an Italian freighter, whose crew relayed news of the incident to a British vessel, which in turn informed British naval authorities in the region. The result was an immediate cessation of shipping and the institution of a blackout. Vice Admiral Martyn Jerram ordered Hampshire, Yarmouth, and the Japanese protected cruiser Chikuma to search for Emden. The British armored cruiser Minotaur and the Japanese armored cruiser Ibuki were sent to patrol likely coaling stations.
 

Attachments

  • Bundesarchiv_DVM_10_Bild-23-61-13,_Kleiner_Kreuzer__SMS_Emden_I_[1].jpg
    Bundesarchiv_DVM_10_Bild-23-61-13,_Kleiner_Kreuzer__SMS_Emden_I_[1].jpg
    51.1 KB · Views: 96
  • Cruise_of_the_Emden_1914_Map[1].png
    Cruise_of_the_Emden_1914_Map[1].png
    92.7 KB · Views: 81
Naval operations in the Adriatic August and September 1914

On 6 August 1914, an Anglo-French naval agreement was signed, giving France the leadership of naval operations in the Mediterranean. The remaining British Mediterranean forces, one armored cruiser, four light cruisers, and 16 destroyers were placed under the control of the French Mediterranean Fleet and both Gibraltar and Malta would be open as bases to the French.

One day after the French declaration of war against Austria-Hungary on 11 August, the French fleet—under Admiral Augustin Boué de Lapeyrère—entered Malta. He had orders to sail with all available French and British ships, pass into the Adriatic Sea and undertake whatever operation he thought best against an Austrian port. Lapeyrère decided to surprise the Austrian vessels enforcing a blockade of Montenegro. The main Allied force comprised the French battleships Courbet, Jean Bart, and the cruiser Jurien de la Gravière. Two French squadrons of pre-dreadnoughts, two squadrons of cruisers, and five destroyer squadrons were held back in support. The British support group comprised two armored cruisers and three destroyer divisions. The Anglo-French force succeeded in cutting off and sinking the old Austro-Hungarian light cruiser SMS Zenta off Bar on 16 August in Battle of Antivari.

Throughout most of late August most of the action was simple bombardment of Serbian and Montenegrin troops by Austrian ships. On 9 August, the pre-dreadnought SMS Monarch shelled the French radio station at Budva, while the destroyer SMS Panther shelled Mount Lovcen. On 17 August, Monarch shelled a Montenegrin radio station off Bar, then another station off Volovica Point on 19 August. Meanwhile, a French squadron shelled Austrian troops on Prevlaka.

The French and Montenegrin forces attempted to cause havoc also at Cattaro in September, October and November 1914, and the KuK navy was called in there also, resulting in a decisive defeat for the Allies.

Both the French and the Austrians spent much of this time laying extensive minefields throughout the shallow waters of the Adriatic. Mostly this was done by destroyers, and at night. Several steamships ran afoul of these mines and either sunk or were damaged.

Voyage Of the Goeben

The pursuit of Goeben and Breslau was a naval action that occurred in the Mediterranean Sea at the outbreak of the First World War when elements of the British Mediterranean Fleet attempted to intercept the German Mittelmeerdivision consisting of the battlecruiser SMS Goeben and the light cruiser SMS Breslau. The Goeben was ordered by its German captain to attack Russian positions, in doing so bringing the Ottoman Empire into the war on the side of the Central Powers.

Though a bloodless "battle", the failure of the British pursuit had enormous political and military ramifications. In the short term it effectively ended the careers of the two British Admirals who had been in charge of the pursuit. Writing several years later, Winston Churchill - who had been First Lord of the Admiralty - expressed the opinion that by forcing Turkey into the war the Goeben had brought "more slaughter, more misery, and more ruin than has ever before been borne within the compass of a ship." certainly the operations of the goeben and breslau played a significant part in bringing turkey into the war on the German side.

Without specific orders, just prior to the the outbreak of hostilities, Souchon (the german squadron commander) had decided to position his ships off the coast of Africa, ready to engage when hostilities commenced. He planned to bombard the embarkation ports of Bône and Philippeville in French Algeria. Goeben was heading for Philippeville, while Breslau was detached to deal with Bône. At 18:00 on 3 August, while still sailing west, he received word that Germany had declared war on France. Then, early on 4 August, Souchon received orders from Admiral Alfred von Tirpitz reading: "Alliance with government of CUP concluded August 3. Proceed at once to Constantinople." So close to his targets, Souchon pushed on and his ships, flying the Russian flag as he approached, carried out their bombardment at dawn before breaking off and heading back to Messina for more coal.

Under a pre-war agreement with Britain, France was able to concentrate her entire fleet in the Mediterranean, leaving the Royal Navy to ensure the security of France′s Atlantic coast. Three squadrons of the French fleet were covering the transports. However, assuming that Goeben would continue west to Gibraltar, the French commander, Admiral de Lapeyrère, sent the "groupe A" of his fleet to the west in order to make contact, but Souchon was heading to the east and so able to slip away.

In Souchon′s path were the two British battlecruisers, Indomitable and Indefatigable, which made contact at 09:30 on 4 August, passing the German ships in the opposite direction. Unlike France, Britain was not yet at war with Germany (the declaration would not be made until later that day, following the start of the German invasion of neutral Belgium), and so the British ships commenced shadowing Goeben and Breslau. Milne reported the contact and position, but neglected to inform the Admiralty that the German ships were heading east. Churchill therefore still expected them to threaten the French transports, and he authorized Milne to engage the German ships if they attacked. However, a meeting of the British Cabinet decided that hostilities could not start before a declaration of war, and at 14:00 Churchill was obliged to cancel his authorization to attack.

(see next post)
 

Attachments

  • Goeben.bmp
    632.9 KB · Views: 119
  • Breslau.bmp
    465.2 KB · Views: 88
Last edited:
The Goeben, evasion and escape

The rated speed of Goeben was 27 kn (31 mph; 50 km/h), but her damaged boilers meant she could only manage 24 kn (28 mph; 44 km/h), and this was only achieved by working men and machinery to the limit; four stokers were killed by scalding steam. Fortunately for Souchon, both British battlecruisers were also suffering from problems with their boilers and were unable to keep Goeben′s pace. The light cruiser HMS Dublin maintained contact, while Indomitable and Indefatigable fell behind. In fog and fading light, Dublin lost contact off Cape San Vito on the north coast of Sicily at 19:37. Goeben and Breslau returned to Messina the following morning, by which time Britain and Germany were at war.

The Admiralty ordered Milne to respect Italian neutrality and stay outside a 6 mi (5.2 nmi; 9.7 km) limit from the Italian coast—which precluded entrance into the passage of the Straits of Messina. Consequently, Milne posted guards on the exits from the Straits. Still expecting Souchon to head for the transports and the Atlantic, he placed two battlecruisers—Inflexible and Indefatigable—to cover the northern exit (which gave access to the western Mediterranean), while the southern exit of the Straits was covered by a single light cruiser, HMS Gloucester. Milne sent Indomitable west to coal at Bizerte, instead of south to Malta.....a fateful error.

For Souchon, Messina was no haven. The Italian authorities insisted that he depart within 24 hours and delayed supplying coal. Provisioning his ships required ripping up the decks of German merchant steamers in harbour and manually shovelling their coal into his bunkers. By the evening of 6 August, despite the help of 400 volunteers from the merchantmen, he had only taken on 1,500 short tons (1,400 t) which was insufficient to reach Constantinople. Further messages from Tirpitz made his predicament even more dire. He was informed that Austria would provide no naval aid in the Mediterranean and that the Ottoman Empire was still neutral and therefore he should no longer make for Constantinople. Faced with the alternative of seeking refuge at Pola, and probably remaining trapped for the rest of the war, Souchon chose to head for Constantinople anyway, his purpose being "to force the Ottoman Empire, even against their will, to spread the war to the Black Sea against their ancient enemy, Russia."

Milne was instructed on 5 August to continue watching the Adriatic for signs of the Austrian fleet and to prevent the German ships joining them. He chose to keep his battlecruisers in the west, dispatching Dublin to join Troubridge′s cruiser squadron in the Adriatic, which he believed would be able to intercept Goeben and Breslau. Troubridge was instructed 'not to get seriously engaged with superior forces', once again intended as a warning against engaging the Austrian fleet. When Goeben and Breslau emerged into the eastern Mediterranean on 6 August, they were met by Gloucester, which, being outgunned, began to shadow the German ships.

Troubridge′s squadron consisted of the armoured cruisers HMS Defence, Black Prince, Warrior, Duke of Edinburgh and eight destroyers armed with torpedoes. The cruisers had 9.2 in (230 mm) guns versus the 11 in (280 mm) guns of Goeben and had armour a maximum of 6 in (15 cm) thick compared to the battlecruiser′s 11 in (28 cm) armour belt. This meant that Troubridge′s squadron was not only outranged and vulnerable to Goeben′s powerful guns, but it was unlikely that his cruiser′s guns could seriously damage the German ship at all, even at short range. In addition, the British ships were several knots slower than Goeben, despite her damaged boilers, meaning that she could dictate the range of the battle if she spotted the British squadron in advance. Consequently, Troubridge considered his only chance was to locate and engage Goeben in favourable light, at dawn, with Goeben east of his ships, and ideally launch a torpedo attack with his destroyers; however, at least five of the destroyers did not have enough coal to keep up with the cruisers steaming at full speed. By 04:00 on 7 August, Troubridge realised he would not be able to intercept the German ships before daylight and after some deliberation he signalled Milne with his intentions to break off the chase, mindful of Churchill′s ambiguous order to avoid engaging a "superior force". No reply was received until 10:00, by which time he had withdrawn to Zante to refuel.

Milne ordered Gloucester to disengage, still expecting Souchon to turn west, but it was apparent to Gloucester′s captain that Goeben was fleeing. Breslau attempted to harass Gloucester into breaking off—Souchon had a collier waiting off the coast of Greece and needed to shake his pursuer before he could rendezvous. Gloucester finally engaged Breslau, hoping this would compel Goeben to drop back and protect the light cruiser. According to Souchon, Breslau was hit, but no damage was done. The action then broke off without further hits being scored. Finally, Milne ordered Gloucester to cease pursuit at Cape Matapan.

Shortly after midnight on 8 August Milne took his three battlecruisers and the light cruiser HMS Weymouth east. At 14:00 he received an incorrect signal from the Admiralty stating that Britain was at war with Austria; war would not be declared until 12 August and the order was countermanded four hours later, but Milne chose to guard the Adriatic rather than seek Goeben. Finally, on 9 August, Milne was given clear orders to "chase Goeben which had passed Cape Matapan on the 7th steering north-east." Milne still did not believe that Souchon was heading for the Dardanelles, and so he resolved to guard the exit from the Aegean, unaware that Goeben did not intend to come out.

Souchon had replenished his coal off the Aegean island of Donoussa on 9 August, and the German warships resumed their voyage to Constantinople. At 17:00 on 10 August, he reached the Dardanelles and awaited permission to pass through. Germany had for some time been courting the Committee of Union and Progress of the imperial government, and it now used its influence to pressure the Turkish Minister of War, Enver Pasha, into granting the ship′s passage, an act that would outrage Russia, which relied on the Dardanelles as its main all-season shipping route. In addition, the Germans managed to persuade Enver to order any pursuing British ships to be fired on. By the time Souchon received permission to enter the straits, his lookouts could see smoke on the horizon from approaching British ships.

Turkey was still a neutral country bound by treaty to prevent German ships from passing the straits. To get around this difficulty it was agreed that the ships should become part of the Turkish navy. On 16 August, having reached Constantinople, Goeben and Breslau were transferred to the Turkish Navy in a small ceremony, becoming respectively the Yavuz Sultan Selim and the Midilli, though they retained their German crews with Souchon still in command. The initial reaction in Britain was one of satisfaction, that a threat had been removed from the Mediterranean. On 23 September, Souchon was appointed commander-in-chief of the Ottoman Navy.
 

Users who are viewing this thread

Back