- Thread starter
- #21
JKim
Senior Master Sergeant
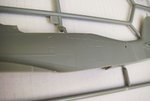
John, the patches of primer were painted over the camo as repairs. German aircraft used a 1 coat system with no primer underneath.
Ah... did not know that. Thanks!
Follow along with the video below to see how to install our site as a web app on your home screen.
Note: This feature may not be available in some browsers.
Ad: This forum contains affiliate links to products on Amazon and eBay. More information in Terms and rules
John, the patches of primer were painted over the camo as repairs. German aircraft used a 1 coat system with no primer underneath.
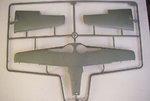
If you look closely at the last pic Andy posted you'll see two spent cartridge chutes - correct for a D-9. Did I see just one on the Hobby Boss kit's lower wing?
Regardless, the more I see of that HB kit, the more I want one. Makes me feel like Goldilocks: Tamiya's too simple, Eduard's too complex, Fujimi's too clunky, Dragon's too tricky...but Hobby Boss is just right!

The twin ejector chutes would be correct for the D-9. The single one on your model seems to depict a D-13 which had a single, larger chute for the engine mounted cannon. (There's a long story about why that is but that's a whole different thread!) To be completely accurate, your two chutes should be slightly smaller than the one provided on the model. To make these, get a drill whose diameter equals the width of the rectangular opening. If you can drill two holes at the front and back of the opening, it's an easy matter to then square up the holes with a #11 blade. If you don't have room for two large holes, just make one on one end and two small holes in the corners at the other end then cut the rest as before.
You should be able to cut the dashes with those masks as well. It will be tricky to cut the different widths precisely to get the white border exactly right though.
Andy's method works well - drill holes and connect the dots - and here's another method: using a brass or steel template, scribe the outline of your ejector chute into the wing, lightly at first and then more aggressively until you've scribed right through. Clean up with a new blade or jeweller's file.
I know you guys must be sick of talking about Doras...