**** DONE: 1/72 Fl.156 Storch - Captured / Aircraft in Foreign Service GB

Ad: This forum contains affiliate links to products on Amazon and eBay. More information in Terms and rules

DBII

Senior Master Sergeant
3,108
1,500
Oct 16, 2007
Conroe, Texas
User name: DBII
Name: David
Category: 1, Beginner
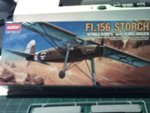
Kit: Acaemy Fl.156 Storch
Scale: 1/72.
Accessories: spare decals

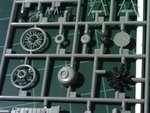
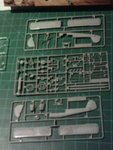
Photo 3 shows the engine. There is no engine on the instruction sheet.:confused: I will get started as soon as I can get the grey green paint. I went back to the hobby shop and they restocked the paint. They ordered everything except RLM 02. My luck. It will be here in 1 or 2 weeks. I may order it online.

DBII
 

Attachments

  • SUNP0050.JPG
    SUNP0050.JPG
    36.8 KB · Views: 308
  • SUNP0047.JPG
    SUNP0047.JPG
    30.3 KB · Views: 947
  • SUNP0049.JPG
    SUNP0049.JPG
    32.4 KB · Views: 350
Last edited by a moderator:
Good choice. But that engine is a radial, used on the post-war, French-built Criquet. The Storch, and those captured by the RAF, had the Argus in-line engine.
 
Interesting profiles there, Wurger. One from a French book and another from a Polish one. The lower Storch W/Nr 475099 is now at the South African Aviation Museum. Built by Mraz in Czechoslovakia and believed to have surrendered in Flensburg.

David, you could put the radial on and make an MS.505a with a 'shaky Jake' radial in Armee de L'Air markings, for something different.
 
Unusual fits me :). I thought about mounting the engine but no directions were included. Besides, I already have the decals for a RAF bird. I just have to wait for the paint to arrive.

DBII
 
The engine is more than likely on the sprue intended for the Criquet kit, with some parts common to both kits released by Academy.
 
The paint came in and it took less than 5 mins to finish. I will have to buy another Germany bird to use up the paint :). This computer does not have a photo manager. I will have to run over to the college to post the photos. I will post some after the holiday.

DBII
 
Here are some photos. Not much to the inside. I dry brushed the floor a little with black. The 4th photo is a dry fitting, there is is not a gap between the left and right sides. :) The 5th picture is the underside of a wing. I will have to paint the slat before I glue it down. The instructions do not show how to paint it. Photos look like it is the same color as the top of the wing but I think it sould be grey. Any thoughts about the correct color?

gb3.jpg
gb2.jpg
gb1.jpg
gb4.jpg
gb5.jpg


DBII
 

Users who are viewing this thread

Back