Good work so far!
Navigation
Install the app
How to install the app on iOS
Follow along with the video below to see how to install our site as a web app on your home screen.
Note: This feature may not be available in some browsers.
More options
You are using an out of date browser. It may not display this or other websites correctly.
You should upgrade or use an alternative browser.
You should upgrade or use an alternative browser.
Doras Galoras - Unofficial GB
- Thread starter Crimea_River
- Start date
Ad: This forum contains affiliate links to products on Amazon and eBay. More information in Terms and rules
More options
Who Replied?wow - I'm surprised that the Guru's havent heard of these products. They're not entirely new. HGW produce full sets for the 109F; 109G; Fw190A; Fw190D; and the P-47. I know these are available in 1/48th but I'm sure I've seen them in 1/32 too. 1/48 sets cost about £15 GBP, not sure about the 1/32. They also do sets of free lines too, but the sets also include plenty of free lines. I got mine off eBay but you can order from HGW direct.
Thanks for comments
Adam
Sometimes you can't see the forest for the trees!

Sometimes you can't see the forest for the trees!
Pearls of wisdom Mr Little!!
Tonight I've added the wing upper surfaces, using the spar that forms the wheel well as a guide to set the dihedral


A slight gap at the front of the port wing, but not too bad. But the junction of wing/fuselage at the back was pretty non existent!!!

I've also installed the upper part of the Quickboost flaps


And started work on the wheel bay

A quick test fit does show that I need to thin down the flap inserts slightly, or the lower wing where they join, and also there is quite a gap that I'll need to fill with plasticard at the lower fuselage that is attached to the lower wing.
I've also test fitted the Quickboost closed cannon covers, and assumed that they would be a simple drop in replacement. However, far from true - there is a great wedge of resin to sand off to make them flat and after doing so I realised that they won't completely fill the apperature in the wing, so I've sanded down the kit parts ready.
Adam
A slight gap at the front of the port wing, but not too bad. But the junction of wing/fuselage at the back was pretty non existent!!!
I've also installed the upper part of the Quickboost flaps
And started work on the wheel bay
A quick test fit does show that I need to thin down the flap inserts slightly, or the lower wing where they join, and also there is quite a gap that I'll need to fill with plasticard at the lower fuselage that is attached to the lower wing.
I've also test fitted the Quickboost closed cannon covers, and assumed that they would be a simple drop in replacement. However, far from true - there is a great wedge of resin to sand off to make them flat and after doing so I realised that they won't completely fill the apperature in the wing, so I've sanded down the kit parts ready.
Adam
Can anyone give me some advice or help with the RV band?
If I was to do a three stripe RV band on the fuselage, how wide would each stripe have to be in 1/48??
Thanks in advance
Adam
6.25mm each, for a 3 stripe Rumpfband...
The TOTAL width of the band in 900mm, applicable for solid, two- and three-colour bands. In the case of the three-colour variety, **normally** they will be based off one of the fuselage insert joins (either front or rear) and all stripes are parallel; two-colour bands will align off the rear edge of the insert, with the first 450mm being parallel - the fwd half however, is often seen following the fuselage frame rivets and going through the rear fuselage jacking point. BUT in both cases, this can differ from a/c to a/c within the same Gruppe and Staffel.
Moral of the story, check ref's for specific a/c.
D
Pearls of wisdom Mr Little!!Wayne Little said:Sometimes you can't see the forest for the trees!
We're in a forest?!?!?!
OBTW, D-15 slowly moves fwd... Its in grey primer, which is taking forever to dry
And of course, its shown up a few more area's that need finishing; nothing major tho... This thing is driving me crazy! Next project is going to be a FIGURE (from Ghost in the Shell, if anyone cares), so I just have to glue it together, finish one or two seams and can spend more time painting than prep'ing!D
6.25mm each, for a 3 stripe Rumpfband...
The TOTAL width of the band in 900mm, applicable for solid, two- and three-colour bands. In the case of the three-colour variety, **normally** they will be based off one of the fuselage insert joins (either front or rear) and all stripes are parallel; two-colour bands will align off the rear edge of the insert, with the first 450mm being parallel - the fwd half however, is often seen following the fuselage frame rivets and going through the rear fuselage jacking point. BUT in both cases, this can differ from a/c to a/c within the same Gruppe and Staffel.
Moral of the story, check ref's for specific a/c.
D
Like to think I will do some of mine this week too Dan....seems we are neck and neck in the slow race!

@Wayne : I like to think that we're saving the best for last mate I just need this primer to fully dry, then I can refinish the 3-4 area's that have Tamiya Surface Primer on them (to fill the minor imperfections). I think the second coat of primer must have been a little too heavy, OR I didn't allow the first coat to properly dry first. All the area's that got one coat (on the first coat) are fine; in fact the thing looks awesome in Grey Primer (I intentionally left the lower wings area that will be metal MOSTLY in black primer/microfiller to save time later). Coating the thing in ONE COLOUR has really brought it together and got me excited about it again.
Once these small flaws are sorted out, I'l do a final prime (I'm trying something different again, me thinks) and paint. The 'something different' plan is to keep the overall grey, then hit all the RLM76 areas with black, as well as pre shade the darker area's (that will be left grey) with black; just another experiement as I really like priming in black, but that obviously makes pre-shading hard - but BLACK under metallic and light colours, just looks so good! Either way, this thing is going to be shot in 8+ colours - Dural-metal, RLM70 Prop, RLM22 Spinner, RLM76 Lower, RLM81/82 Upper (601-series (late) standard layout), then two or three RAL colours on the power egg, windscreen and fwd-upper fuselage (as the evidence seems to suggest Roland was using RAL colours at the time) - undercarriage will be a mix of RLM02 and Metal components... Fun!
Yes, really looking fwd to painting it in a fairly unique, dark scheme.
BTW Wayne - I know you've painted some lower tail-plane surfaces in metal also; is that based upon JUST the capture photo's of H-1 150168 or a more broader sample of D-series a/c as well?
D
I just need this primer to fully dry, then I can refinish the 3-4 area's that have Tamiya Surface Primer on them (to fill the minor imperfections). I think the second coat of primer must have been a little too heavy, OR I didn't allow the first coat to properly dry first. All the area's that got one coat (on the first coat) are fine; in fact the thing looks awesome in Grey Primer (I intentionally left the lower wings area that will be metal MOSTLY in black primer/microfiller to save time later). Coating the thing in ONE COLOUR has really brought it together and got me excited about it again.Once these small flaws are sorted out, I'l do a final prime (I'm trying something different again, me thinks) and paint. The 'something different' plan is to keep the overall grey, then hit all the RLM76 areas with black, as well as pre shade the darker area's (that will be left grey) with black; just another experiement as I really like priming in black, but that obviously makes pre-shading hard - but BLACK under metallic and light colours, just looks so good! Either way, this thing is going to be shot in 8+ colours - Dural-metal, RLM70 Prop, RLM22 Spinner, RLM76 Lower, RLM81/82 Upper (601-series (late) standard layout), then two or three RAL colours on the power egg, windscreen and fwd-upper fuselage (as the evidence seems to suggest Roland was using RAL colours at the time) - undercarriage will be a mix of RLM02 and Metal components... Fun!
Yes, really looking fwd to painting it in a fairly unique, dark scheme.
BTW Wayne - I know you've painted some lower tail-plane surfaces in metal also; is that based upon JUST the capture photo's of H-1 150168 or a more broader sample of D-series a/c as well?
D
- Thread starter
- #931
Crimea_River
Marshal
Doing great Adam.
A4K
Brigadier General
Unusual approach, but nice work Adam!
@Wayne : I like to think that we're saving the best for last mate
Once these small flaws are sorted out, I'l do a final prime (I'm trying something different again, me thinks) and paint. The 'something different' plan is to keep the overall grey, then hit all the RLM76 areas with black, as well as pre shade the darker area's (that will be left grey) with black; just another experiement as I really like priming in black, but that obviously makes pre-shading hard - but BLACK under metallic and light colours, just looks so good! Either way, this thing is going to be shot in 8+ colours - Dural-metal, RLM70 Prop, RLM22 Spinner, RLM76 Lower, RLM81/82 Upper (601-series (late) standard layout), then two or three RAL colours on the power egg, windscreen and fwd-upper fuselage (as the evidence seems to suggest Roland was using RAL colours at the time) - undercarriage will be a mix of RLM02 and Metal components... Fun!
Yes, really looking fwd to painting it in a fairly unique, dark scheme.
BTW Wayne - I know you've painted some lower tail-plane surfaces in metal also; is that based upon JUST the capture photo's of H-1 150168 or a more broader sample of D-series a/c as well?
D
best for last....i like it..
8 colours...c'mon you can think of some more
Tail plane lower surfaces, only aircraft I recall doing off the top of my head was Ta152 prototype V18/U2 CF+OY in 1/72, which has an error I still have to correct by the way! where one image gives me the distinct impression of being NMF, so that was the call I made.
@Wayne - 8 MAJOR colours (I was trying to sus out of the 601-series have the 'diagonal grey' panel on the rear fuselage too, which I have come to the conclusion they dont) - though I am tempted to do more; for example, I suspect the Windscreen frame is likely RLM83 and the lower surfaces of the Power Egg maybe be a RAL colour too (but I will likely just use a RLM76 or RLM65 variant). Its hard to pick though, with so few known B&W images; so as you well know, its a case of taking what we know about the 601-series D-9's, the Ta152C power egg production, DB-Roland and of course what we THINK we can make out in the pictures.
And yeah, we're definately saving the best for last...
As for the D-15, well a few hours in front of a hot-air heater last night did wonders for the primer. I think a few more hours and we'll be good to continue work. I should probably do some happy snaps while its all in grey as it really looks cool; from some angles, the slightly chunkier DB nose and radiator, combined with the streamlines deck lid and BIG supercharger intake, really make this thing look cool!
D
Oh and Wayne, didn't you do a 1/72 Ta 152H-0/H-1 with NMF under the tails? One of the Aoshima kits or something? Its about time I started looking at 601-series a/c in more detail, for things like Flaps, Doors, Mottle Patterns, Wing Spar, etc... Time to put this D-15 in front of the warm-air blower again for a few hours...
D
D
Oh and Wayne, didn't you do a 1/72 Ta 152H-0/H-1 with NMF under the tails? One of the Aoshima kits or something? Its about time I started looking at 601-series a/c in more detail, for things like Flaps, Doors, Mottle Patterns, Wing Spar, etc... Time to put this D-15 in front of the warm-air blower again for a few hours...
D
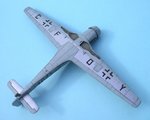
Yes, this one....
Attachments
Hey, we're BACK!!!
Oh look... It was V18/U2; for some reason I remembered it as a production Ta 152H-series - duh!
As for D-15/601286, well once again its sitting in front of a warm air blower, slowly curing. Having asked a fellow D-9 fan the other day, when the forum was down, I will throw this open to all; does anyone have any techniques for curing ModelMaster primer that has been applied too thick in places and thus remained slightly tacky? (No I'm not talking about an ex-girlfriend either, when I say Thick and Tacky either ). The Primer was thinned at about 2.5:1 (Thinner to primer) and area's that were coated thinly, dried within 30-60 minutes; however I seem to have coated some areas too think (area's that I knew would require a finishing sanding). It does look REALLY good in Grey Primer tho
I seem to remember reading somewhere, that people had success with various curing techniques; the one that sticks in my head is applying another, THIN coat of MM Primer, who's curing would also cure the thick coat beneath? But before I go off and try anything, I thought I'd double check...
So, does anyone have any solutions, or do I need to just take the punishment and continue to wait, letting it eventually cure naturally (in fronty of a warm air blower now and then)? Gives me a chance to start one of these Ta 183's I suppose!
Dan
Oh look... It was V18/U2; for some reason I remembered it as a production Ta 152H-series - duh!
As for D-15/601286, well once again its sitting in front of a warm air blower, slowly curing. Having asked a fellow D-9 fan the other day, when the forum was down, I will throw this open to all; does anyone have any techniques for curing ModelMaster primer that has been applied too thick in places and thus remained slightly tacky? (No I'm not talking about an ex-girlfriend either, when I say Thick and Tacky either
). The Primer was thinned at about 2.5:1 (Thinner to primer) and area's that were coated thinly, dried within 30-60 minutes; however I seem to have coated some areas too think (area's that I knew would require a finishing sanding). It does look REALLY good in Grey Primer tho I seem to remember reading somewhere, that people had success with various curing techniques; the one that sticks in my head is applying another, THIN coat of MM Primer, who's curing would also cure the thick coat beneath? But before I go off and try anything, I thought I'd double check...
So, does anyone have any solutions, or do I need to just take the punishment and continue to wait, letting it eventually cure naturally (in fronty of a warm air blower now and then)? Gives me a chance to start one of these Ta 183's I suppose!
Dan
Nicely done so far!
Users who are viewing this thread
Total: 1 (members: 0, guests: 1)