Navigation
Install the app
How to install the app on iOS
Follow along with the video below to see how to install our site as a web app on your home screen.
Note: This feature may not be available in some browsers.
More options
You are using an out of date browser. It may not display this or other websites correctly.
You should upgrade or use an alternative browser.
You should upgrade or use an alternative browser.
1/48 Tamiya Brewster F2A-2 Buffalo
- Thread starter Grant Barr
- Start date
Ad: This forum contains affiliate links to products on Amazon and eBay. More information in Terms and rules
More options
Who Replied?Crimea_River
Marshal
You've used your bench time very well Grant. Excellent work.
fubar57
General
Looking good
SaparotRob
Unter Gemeine Geschwader Murmeltier XIII
This was the model I wanted to buy years ago. The shop didn't have it but they did have the Finnish version, which I purchased. I'm looking forward to this build.
I love yellow wings.
*Upon closer inspection it's Hasegawa.
I love yellow wings.
*Upon closer inspection it's Hasegawa.
Last edited:
Lovely work so far!
- Thread starter
- #26
Grant Barr
Senior Airman
More activity to report!
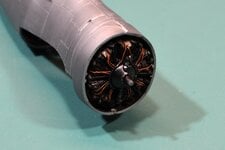
Having completed the engine, the time came to install it on my revised bulkhead. Fits like a glove - at least it bl**dy well should given the huge amount of test fitting I did...
While waiting for the glue to dry on the engine I started the process of masking the canopy - not having purchased pre-cut masks for this one. First thing I noticed was that the main sliding canopy has curved corners both top and bottom. This necessitated getting out my new punch set and popping out some 1.2mm dots (having first stuck the tape to some decal cover sheet paper). I had to punch out 28 of these tiny little suckers and then go through the tedious task of getting them off the backing paper and onto the canopy - bit boggle eyed after that job...
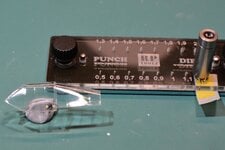
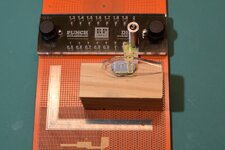
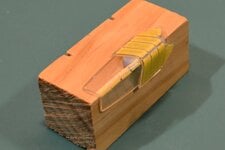
As you can see I am still only part way through the masking - its a canopy with a LOT of individual panels. I am yet to even look at the glass view panel at the bottom of the fuselage, hoping it does not have any curved corners.
Once I was sure the glue on the engine was cured I went about fitting the wings. Again a lot of test fitting was required, mostly to ensure that the fuselage panels forward of the wing leading edge and above the exhaust outlets matched up properly. The original set up had a guide pin but this pushed the lower section way too far inwards, besides which it had to go when I scratched up the new exhausts. You might be able to see in the photo of the LHS the panel did not quite line up exactly, but the difference is quite small and easily cleaned up I hope.
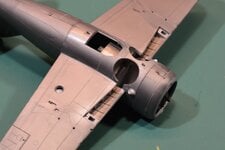
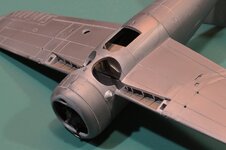
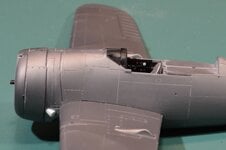
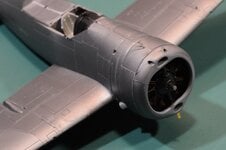
You can also see in these photos the final fitting for the engine cowl ring. Given the fit issues I had earlier on in the build (own goal!) I am pretty pleased with how it all turned out. It did require a little bit of smoothing in a couple of sections, but all in all it was pretty good.
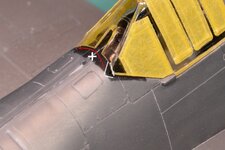
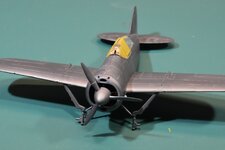
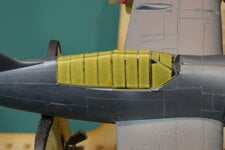
Because I wanted to get an idea of how the aircraft would look, I quickly just mocked up the fit of the canopy, prop and undercarriage legs. Popping the canopy in place did reveal that I will need to apply some filler to the leading edges of the frame (see photo 39 - canopy close up). I highlighted the LHS gap area with the white lines, but have a similar but slightly smaller issue on the RHS. So far its been the only crappy fit issue I've had with this kit (those I have had have all been my own doing!).
That's about all I have in the way of updates. Really would like to get a base coat of Mr Surfacer 1000 laid down this weekend so I can get a better sense of the condition of the surface. Once that is done I can lay down some nice Vallejo gloss black primer in preparation for the NMF. This will be the very first NMF I have attempted so I am reading up a bit on other people's techniques and tricks. I am already not a huge fan of the Vallejo silvers (they tend to go very grainy despite adding flow improver and drying retardant), so there may be a lot of swearing and cursing in the coming weeks! I do have some Mr Hobby enamel silvers but I don't want to use them and risk the wrath of the boss when the smell gets everywhere.
Anyway, thanks for popping by with comments and reactions.
Having completed the engine, the time came to install it on my revised bulkhead. Fits like a glove - at least it bl**dy well should given the huge amount of test fitting I did...

While waiting for the glue to dry on the engine I started the process of masking the canopy - not having purchased pre-cut masks for this one. First thing I noticed was that the main sliding canopy has curved corners both top and bottom. This necessitated getting out my new punch set and popping out some 1.2mm dots (having first stuck the tape to some decal cover sheet paper). I had to punch out 28 of these tiny little suckers and then go through the tedious task of getting them off the backing paper and onto the canopy - bit boggle eyed after that job...


As you can see I am still only part way through the masking - its a canopy with a LOT of individual panels. I am yet to even look at the glass view panel at the bottom of the fuselage, hoping it does not have any curved corners.
Once I was sure the glue on the engine was cured I went about fitting the wings. Again a lot of test fitting was required, mostly to ensure that the fuselage panels forward of the wing leading edge and above the exhaust outlets matched up properly. The original set up had a guide pin but this pushed the lower section way too far inwards, besides which it had to go when I scratched up the new exhausts. You might be able to see in the photo of the LHS the panel did not quite line up exactly, but the difference is quite small and easily cleaned up I hope.


You can also see in these photos the final fitting for the engine cowl ring. Given the fit issues I had earlier on in the build (own goal!) I am pretty pleased with how it all turned out. It did require a little bit of smoothing in a couple of sections, but all in all it was pretty good.
Because I wanted to get an idea of how the aircraft would look, I quickly just mocked up the fit of the canopy, prop and undercarriage legs. Popping the canopy in place did reveal that I will need to apply some filler to the leading edges of the frame (see photo 39 - canopy close up). I highlighted the LHS gap area with the white lines, but have a similar but slightly smaller issue on the RHS. So far its been the only crappy fit issue I've had with this kit (those I have had have all been my own doing!).


That's about all I have in the way of updates. Really would like to get a base coat of Mr Surfacer 1000 laid down this weekend so I can get a better sense of the condition of the surface. Once that is done I can lay down some nice Vallejo gloss black primer in preparation for the NMF. This will be the very first NMF I have attempted so I am reading up a bit on other people's techniques and tricks. I am already not a huge fan of the Vallejo silvers (they tend to go very grainy despite adding flow improver and drying retardant), so there may be a lot of swearing and cursing in the coming weeks! I do have some Mr Hobby enamel silvers but I don't want to use them and risk the wrath of the boss when the smell gets everywhere.
Anyway, thanks for popping by with comments and reactions.
Vic Balshaw
Major General
Excellent stuff, like the punch set. Can you tell us where you got it. 

- Thread starter
- #28
Grant Barr
Senior Airman
Thanks Vic. Pretty sure I got the punch set through BNA Model World. I do remember it was a bit pricy, but I actually wanted it for a non-model related job (convenient excuse???).Excellent stuff, like the punch set. Can you tell us where you got it.

Crimea_River
Marshal
Great work Grant. Not pleasant when there is work needed around the canopy fit but I'm sure you'll make a good job of it.
Nice work so far!
- Thread starter
- #32
Grant Barr
Senior Airman
Some more minor progress to report.
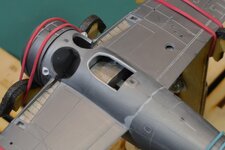
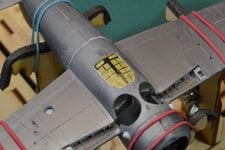
I finalised the masking for both the canopy and the underside window panel, and set about making sure everything was fitting as advertised. Cockpit was not too bad, but when I really looked at the lower window panel I realised that it had a nearly 0.25mm gap all round. This made the clear acetate panel sit way too low into the fuselage and really need to be fixed. I thought about packing the little ledge provided on the fuselage to make the panel sit flush, but I would still have to resolve what to do with the gap. I ended up just fixing some 0.25mm styrene strip around the fuselage cut out and then trimming the excess and thinning the thickness where necessary. The end result is as you see below with the panel sitting nicely flush, really quite happy with how this fix turned out.
As for the canopy, I sanded the surfaces that would contact the fuselage to make sure that everything fits nice and flush. This means that I will only need to deal with the big gaps at the front with some form of filler and tidy up.
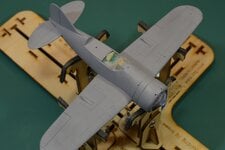
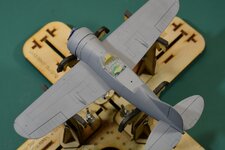
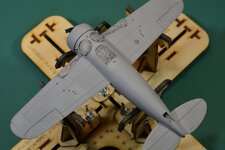
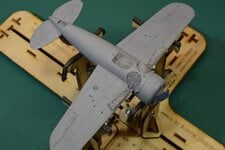
Once that was done I got all excited and laid down an initial coat of Mr Surfacer 1000 as a primer/base coat. This stuff is great for hiding a lot of the little scratches and divots caused by handling, but more importantly it makes the deeper scratches and seam gaps really stand out. It looks pretty good in the attached shots, but a close inspection has revealed quite a number of sections to be revisited with Mr Surfacer 500 and some wet sanding back to blend it all in. I also realised that in my excitement to get some form of "paint" laid down, I had neglected to fix a couple of joint lines which I had sanded out of existence.
I have already wet sanded this coat back to be super smooth and applied some filler to the remaining gaps and blemishes. These have also been sanded back, and I will need to reinstate the missing panel lines on my next visit to the workbench. No photos of this stage just yet - I'll have to remember to do this first up at the workbench next time around.
I used to dread the painting stages of the build, but I am now finding this to be a really enjoyable part of the process. I suspect this may be related to feeling much more confident with the airbrush and how the various paints work at their own best consistencies and air pressures. A lot of listening to everybody else's experiences here has also been really helpful, combined with trial and error on my part - it all certainly adds to that improvement.
That's all I have for now. As always, thanks for popping by for a look and/or comments along the way.
I finalised the masking for both the canopy and the underside window panel, and set about making sure everything was fitting as advertised. Cockpit was not too bad, but when I really looked at the lower window panel I realised that it had a nearly 0.25mm gap all round. This made the clear acetate panel sit way too low into the fuselage and really need to be fixed. I thought about packing the little ledge provided on the fuselage to make the panel sit flush, but I would still have to resolve what to do with the gap. I ended up just fixing some 0.25mm styrene strip around the fuselage cut out and then trimming the excess and thinning the thickness where necessary. The end result is as you see below with the panel sitting nicely flush, really quite happy with how this fix turned out.


As for the canopy, I sanded the surfaces that would contact the fuselage to make sure that everything fits nice and flush. This means that I will only need to deal with the big gaps at the front with some form of filler and tidy up.

Once that was done I got all excited and laid down an initial coat of Mr Surfacer 1000 as a primer/base coat. This stuff is great for hiding a lot of the little scratches and divots caused by handling, but more importantly it makes the deeper scratches and seam gaps really stand out. It looks pretty good in the attached shots, but a close inspection has revealed quite a number of sections to be revisited with Mr Surfacer 500 and some wet sanding back to blend it all in. I also realised that in my excitement to get some form of "paint" laid down, I had neglected to fix a couple of joint lines which I had sanded out of existence.


I have already wet sanded this coat back to be super smooth and applied some filler to the remaining gaps and blemishes. These have also been sanded back, and I will need to reinstate the missing panel lines on my next visit to the workbench. No photos of this stage just yet - I'll have to remember to do this first up at the workbench next time around.
I used to dread the painting stages of the build, but I am now finding this to be a really enjoyable part of the process. I suspect this may be related to feeling much more confident with the airbrush and how the various paints work at their own best consistencies and air pressures. A lot of listening to everybody else's experiences here has also been really helpful, combined with trial and error on my part - it all certainly adds to that improvement.
That's all I have for now. As always, thanks for popping by for a look and/or comments along the way.
Vic Balshaw
Major General
Doing some good stuff there Grant and I particularly like the lower window panel fix. 

Crimea_River
Marshal
Based on what you've achieved so far, this will be a cracker of a build. Good staff Grant.
Airframes
Benevolens Magister
With all above - some nice work achieved there Grant.
T Bolt
Colonel
Yes, very nice work Grant
fubar57
General
Beauty.
Looks good so far!
- Thread starter
- #40
Grant Barr
Senior Airman
I have found some time to do a little bit more to the Buffalo in the past couple of days.
I wet sanded the first filler base coat and found that it really needed a second coat to fix some of the more problematic areas such as fuselage joins and wing seams.
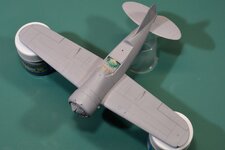
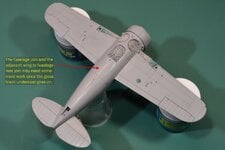
These two shots show the second coat having been wet sanded back to give it a smooth and even finish. I found that it is a real "art" to getting the fine grade wet sanding to achieve the results I want. I always want to go to a coarser grade and then wonder why I blow through to the plastic so quickly. This time I went about 3 or 4 grades finer with my Micro Mesh pads and was much happier with the results. Clearly patience has not been one of my virtues for previous builds. As noted in the photo there are still some seam areas that will need attention when I put down the first coat of primer.
These next shots show the masking prep done for the gloss black primer.
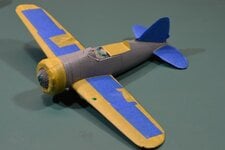
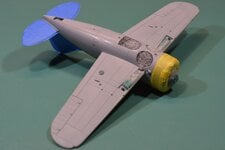
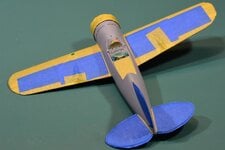
As the fuselage and the wing undersides will be NMF, these surfaces will be primed with the gloss black. The other surfaces will need a much lighter primer so I decided to mask off the coloured areas so I don't have to lay down a heavy light coloured primer just to overpower the black - hope that makes sense...
As the top of the wings will be Yellow, the tail surfaces will be Lemon Yellow and the engine cowl will be Bright Blue, I want the primer for these to be white. This will allow for much better coverage, especially for the Yellows which can be very translucent. Once the black has gone down I will mask these areas off and do the white. Its a bit laborious, but I would really like the paint job on this kit to stand out - it's my very first attempt at a NMF since restarting this hobby a couple of years back. Could be an interesting ride!
Hoping that I get some black primer laid down tomorrow afternoon and will be able to get some more progress shots uploaded. Thanks for dropping by, all your feedback and reactions are appreciated.
I wet sanded the first filler base coat and found that it really needed a second coat to fix some of the more problematic areas such as fuselage joins and wing seams.


These two shots show the second coat having been wet sanded back to give it a smooth and even finish. I found that it is a real "art" to getting the fine grade wet sanding to achieve the results I want. I always want to go to a coarser grade and then wonder why I blow through to the plastic so quickly. This time I went about 3 or 4 grades finer with my Micro Mesh pads and was much happier with the results. Clearly patience has not been one of my virtues for previous builds. As noted in the photo there are still some seam areas that will need attention when I put down the first coat of primer.
These next shots show the masking prep done for the gloss black primer.


As the fuselage and the wing undersides will be NMF, these surfaces will be primed with the gloss black. The other surfaces will need a much lighter primer so I decided to mask off the coloured areas so I don't have to lay down a heavy light coloured primer just to overpower the black - hope that makes sense...
As the top of the wings will be Yellow, the tail surfaces will be Lemon Yellow and the engine cowl will be Bright Blue, I want the primer for these to be white. This will allow for much better coverage, especially for the Yellows which can be very translucent. Once the black has gone down I will mask these areas off and do the white. Its a bit laborious, but I would really like the paint job on this kit to stand out - it's my very first attempt at a NMF since restarting this hobby a couple of years back. Could be an interesting ride!
Hoping that I get some black primer laid down tomorrow afternoon and will be able to get some more progress shots uploaded. Thanks for dropping by, all your feedback and reactions are appreciated.
Users who are viewing this thread
Total: 1 (members: 0, guests: 1)
