Skyediamonds
Staff Sergeant
- 1,083
- May 26, 2018
Good evening gentlemen and fellow guest:
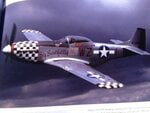
Tonight I am opening a new build thread very similar to previous build threads ( See Guillow's S.E.5 and Guillow's Wright Flyer) in which I take a Guillow's wooden kit and build it beyond the stick-n-tissue format into a more realistic representation of the full sized aircraft. The exception here is that I'll be posting my builds "live" as I progress through the various stages rather than presenting a build thread with the model already completed. Thus, this thread will take several months to see the end result. However, the good news is I'll be open to ideas, suggestions, observations and any comments pertinent to the build itself and to the model. In another words, I would like to see some of our members actively particpate. I've decided to model this "D" Mustang as the later version of Big Beautiful Doll which depicts Col. Landers' plane as it racked up 36 victories. I have already contacted our esteemed fellow member, Mr. Wurger for information on BBD (as I'll abbreviate the name every once in awhile), and asked for his guidance as well as observations.
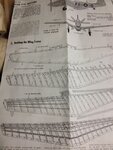
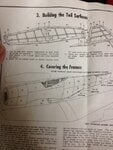
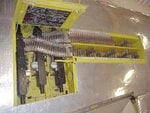
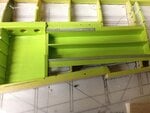
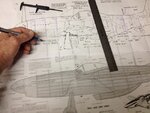
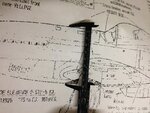
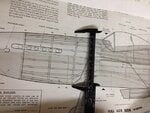
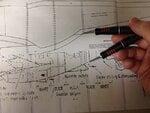
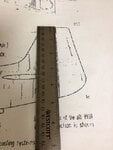
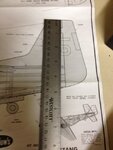
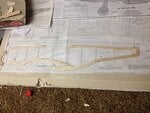
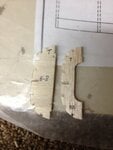
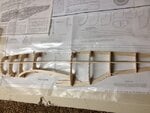
As of this writing, I have already framed up the wings and fuselage. However, they're not even close to being complete. They are still in the rough framed stage. I also just started on the vertical and horizontal tail feathers last night. They will be fabricated from sheets of solid balsa wood, rather than being framed up.
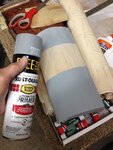
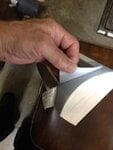
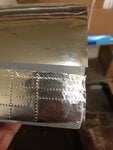
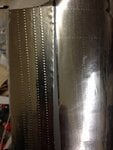
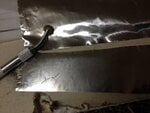
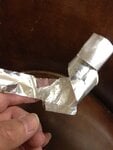
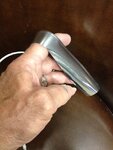
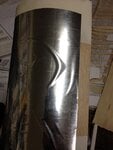
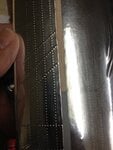
It's my intentions to model this aircraft in overall natural metal finish. Rather than taking the "usual" route of painting the model silver to represent the metal paneling, I've decided to really try something really different. I decided to use a product called Flite Metal. This product is an actual aluminum foil covering with a sticky adhesive backing. It comes in a roll that is 24" in width (I apologize for using the English measurements) and the length is cut per customer's needs/requirements (usually the minimum is about 10 feet). There are other products such as chrome vinyl that offer similar characteristics and I will gladly be posting the comparison between the two, siting their advantages and disadvantages and my choice for Flite Metal. Chrome vinyl is easily obtained through the Google search on the Internet. If anyone should express an interest in obtaining Flite Metal, I shall be happy to provide all of the relevant information. It is curently in production and the vendor is extremely active and supportive.
I will also be posting dozens of photos of each build stage as I progess along. Because photography in itself can slow down the build, I gave myself a "head start" in building the model and taking pictures through the build before opening up this post. This way, I'm hoping that I can give our fellow members a quick overall view of my concepts and approach to this build.
Some of you may ask "Why did I choose the Mustang?" And, "Why Big Beautiful Doll?" Truth be told, it is for my daughter. She insisted that if I'm to build her a model for her to keep as a family heirloom, she wanted a P-51D Mustang and finished off as BBD. She already has a full sized poster of the cockpit interior of BBD hanging up on the wall in her home. I tried to talk her out of it (Lord knows I tried) but she was adamant. So, without further ado, I'll start the posting tonight.
Tonight I am opening a new build thread very similar to previous build threads ( See Guillow's S.E.5 and Guillow's Wright Flyer) in which I take a Guillow's wooden kit and build it beyond the stick-n-tissue format into a more realistic representation of the full sized aircraft. The exception here is that I'll be posting my builds "live" as I progress through the various stages rather than presenting a build thread with the model already completed. Thus, this thread will take several months to see the end result. However, the good news is I'll be open to ideas, suggestions, observations and any comments pertinent to the build itself and to the model. In another words, I would like to see some of our members actively particpate. I've decided to model this "D" Mustang as the later version of Big Beautiful Doll which depicts Col. Landers' plane as it racked up 36 victories. I have already contacted our esteemed fellow member, Mr. Wurger for information on BBD (as I'll abbreviate the name every once in awhile), and asked for his guidance as well as observations.
As of this writing, I have already framed up the wings and fuselage. However, they're not even close to being complete. They are still in the rough framed stage. I also just started on the vertical and horizontal tail feathers last night. They will be fabricated from sheets of solid balsa wood, rather than being framed up.
It's my intentions to model this aircraft in overall natural metal finish. Rather than taking the "usual" route of painting the model silver to represent the metal paneling, I've decided to really try something really different. I decided to use a product called Flite Metal. This product is an actual aluminum foil covering with a sticky adhesive backing. It comes in a roll that is 24" in width (I apologize for using the English measurements) and the length is cut per customer's needs/requirements (usually the minimum is about 10 feet). There are other products such as chrome vinyl that offer similar characteristics and I will gladly be posting the comparison between the two, siting their advantages and disadvantages and my choice for Flite Metal. Chrome vinyl is easily obtained through the Google search on the Internet. If anyone should express an interest in obtaining Flite Metal, I shall be happy to provide all of the relevant information. It is curently in production and the vendor is extremely active and supportive.
I will also be posting dozens of photos of each build stage as I progess along. Because photography in itself can slow down the build, I gave myself a "head start" in building the model and taking pictures through the build before opening up this post. This way, I'm hoping that I can give our fellow members a quick overall view of my concepts and approach to this build.
Some of you may ask "Why did I choose the Mustang?" And, "Why Big Beautiful Doll?" Truth be told, it is for my daughter. She insisted that if I'm to build her a model for her to keep as a family heirloom, she wanted a P-51D Mustang and finished off as BBD. She already has a full sized poster of the cockpit interior of BBD hanging up on the wall in her home. I tried to talk her out of it (Lord knows I tried) but she was adamant. So, without further ado, I'll start the posting tonight.